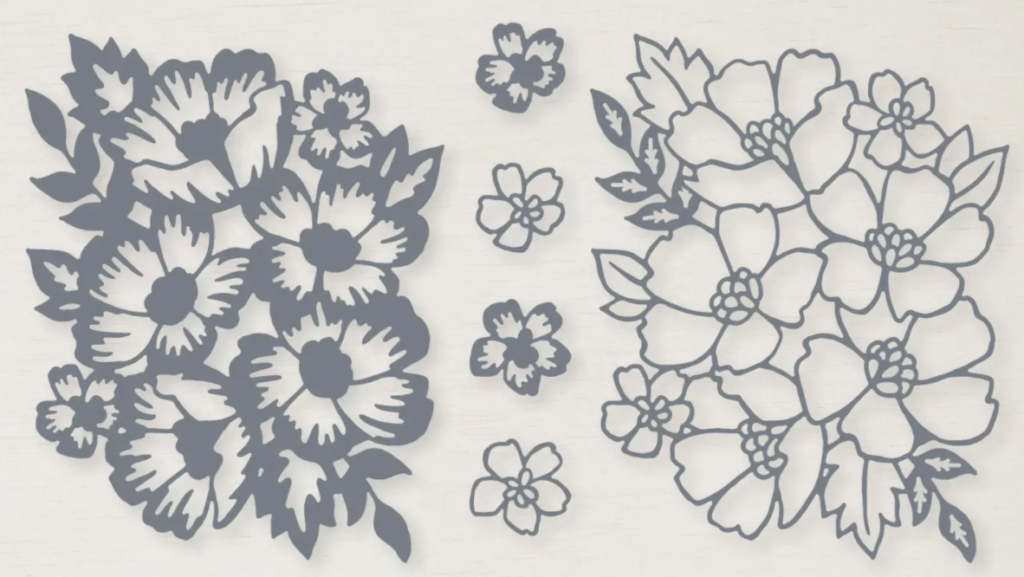
If you don’t know by now that I’m a sucker for florals, well, consider yourself informed. Whether that’s a stamp set or dies, I haven’t met too many floral sets that don’t make me smile. In the case of the Blossoms in Bloom stamp set though, it didn’t speak to me. The accompanying Many Layered Blossoms Dies, however, THOSE I fell in love with at first sight. I will be honest though, these dies are intricate. Although gorgeous, adhering only one of the two layers to a card or adhering them both together can be tricky, but there are a couple of different methods you can use.
For this post, I wanted to show you two completely different approaches to using these dies to demonstrate their versatility. For both examples, I used the larger of the two dies, which is actually the background layer in the set. Personally, I find this layer easier to work with when it comes to adhering to the card, but that’s just me.
For my first card, I went with a subtle approach. Once I saw this card uploaded to Pinterest by Chris Smith, I knew I had to C.A.S.E. (Copy And Selectivity Edit or Copy And Share (Steal) Everything). My colors are Very Vanilla and Mint Macaron accented with Basic Pearl Jewels and ribbon from the now retired Forever Greenery Trim Combo pack.
Tip for adhering these die cuts? You can add a bit of liquid Tombow glue to a silicone craft sheet and using a sponge, dab it into the glue and then lightly dab that onto the die cut. The glue, when dried on the silicone, will rub right off. For really intricate die cuts, I recommend adhesive sheets. Before you die cut, you estimate the size of the piece you’ll cut. You add the adhesive sheet to the back of the paper, die cut it, then remove the adhesive backing and add it to your card or on top of another die cut! These sheets can be cut down to size and already come partially pre-cut for smaller projects.

Here are the dimensions and instructions:
– Very Vanilla card base ( 5.5 x 4.25 folded cut from 8.5 x 11 )
– Mint Macaron 8.5 x 11 cut at 5.5″. Use 1 piece to die cut the blossoms (one large and two of the small sized). The other piece cut down to 5.5″ x 4.5.
– Adhere the die cut to the above Mint Macaron piece, aligning the bottom stem to the bottom right of the cardstock but not quite touching the bottom as shown. Trim whatever is hanging off at the top.
– Wrap ribbon around the top edge, leaving some to hang over onto the Very Vanilla, creating a ribbon border as shown.
– Die cut a circle or other similar sized shape that is at least 2″ in diameter – large enough to overlap both color cardstock and to allow room for a small sentiment and a flower. Also die cut three of the smaller sized flowers our of Very Vanilla.
– Adhere one of the Very Vanilla blossoms to the edge of your shape and trim off the excess. You’ll adhere the thin “top” version to a “bottom” version of the Mint Macaron blossom. This will be glued into your Very Vanilla shape with the sentiment.
– Adhere the sentiment shape onto your card toward the top left. Leave room for a bow. Adhere with dimensionals. You will adhere the remaining smaller blooms just under that shape so they peek out from beneath.
– Create a bow and adhere with one or two mini glue dots.
– Complete your card by adding some Basic Pearl Jewels.
For my next card, I took a completely different approach, but I love the outcome! With these cards, I started with a piece of Basic White cardstock and used my blending brushes to create this sunset of colors. From top to bottom, I used Melon Mambo, just a little Pumpkin Pie and Daffodil Delight. I cut one of the pieces first and used that as a reference while blending since I didn’t want all of my largest blooms to be the same color. I then die cut that piece and adhered it to my Basic White “reference” die cut to give it added height and dimension once it was on the finished card. If you keep scrolling, there’s a picture that shows how that looks.

I knew my finished pieces were going to be a layer on another piece of cardstock, so I used a piece of Basic Black cardstock that was cut to (10 3/4 x 4 1/8) . At least I’m almost positive those were my measurements. Next time, I’ll write them down and correct this, if needed. Anyway, I found the center of this long piece and marked the top and bottom with a pencil. I centered the entire assembled die cut on the Basic Black and adhered it, then I cut it down the middle to make two card fronts.
Just a word of advice. This will be THICK with three layers. Be sure your trimmer can handle it. I used a guillotine cutter to cut this. I did have some bits that weren’t glued down, so I fixed those and then mounted one of my fronts to a 4.25 x 5.5 Basic Black and the other to Basic White cardstock. Personally, I think I like the black on black. Then I embossed the word “thanks” in white embossing powder on a scrap piece of Basic Black cardstock and fussy cut around it. It’s adhered with Stampin’ Dimensionals although in these images, it’s really hard to tell.
I would love to know which version is your favorite.


